Water Colored Sides and Multi-colored Stars")
Cake Decorating for Kids (Beginners) using the Water Color Technique on the Sides and Multi-colored Star Flowers on the top.
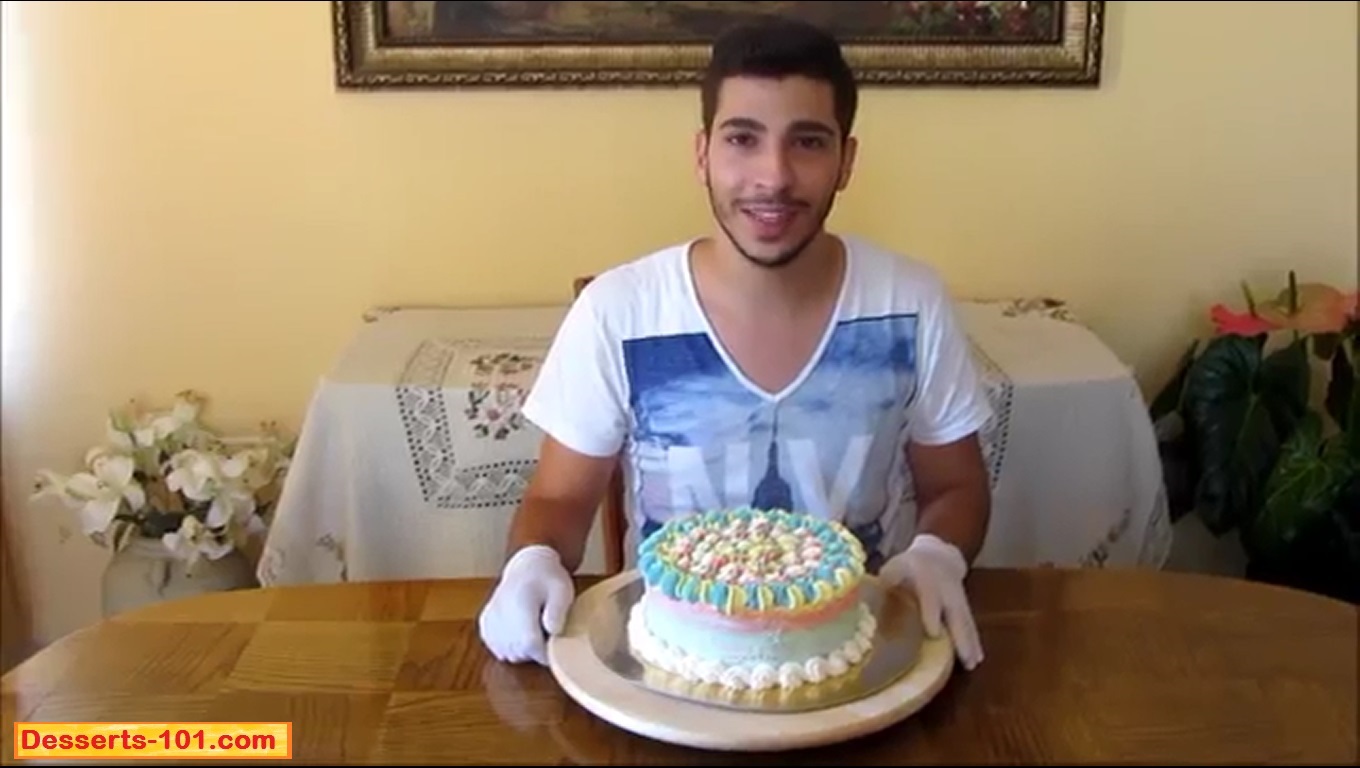
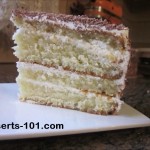
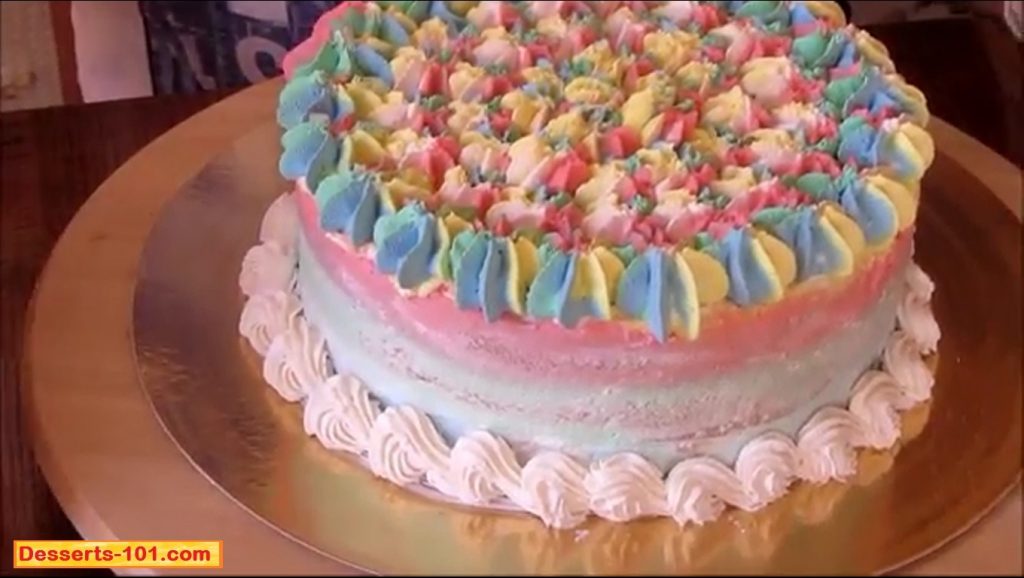
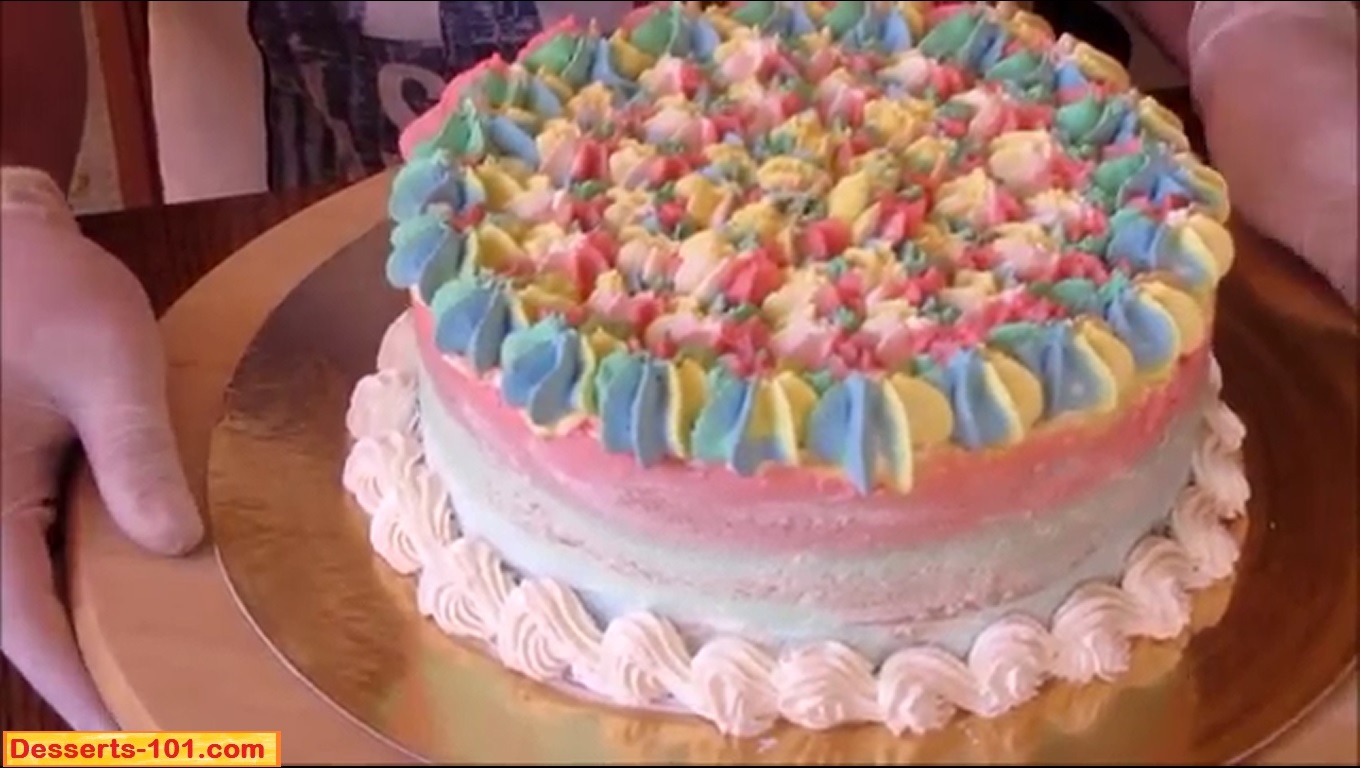
My finished Easy Decorated Cake for beginners. I used a water color technique and a rainbow stars.
Everyone asks me how to decorate a beautiful cake for a beginner. Well, this cake is for you. It looks fancy and people will think you spent a lot of time decorating when, with just a few tricks, you easily did it in a flash. That’s right you can do it too. Follow along and I will show you how it is done.
Starting out. What supplies we need.

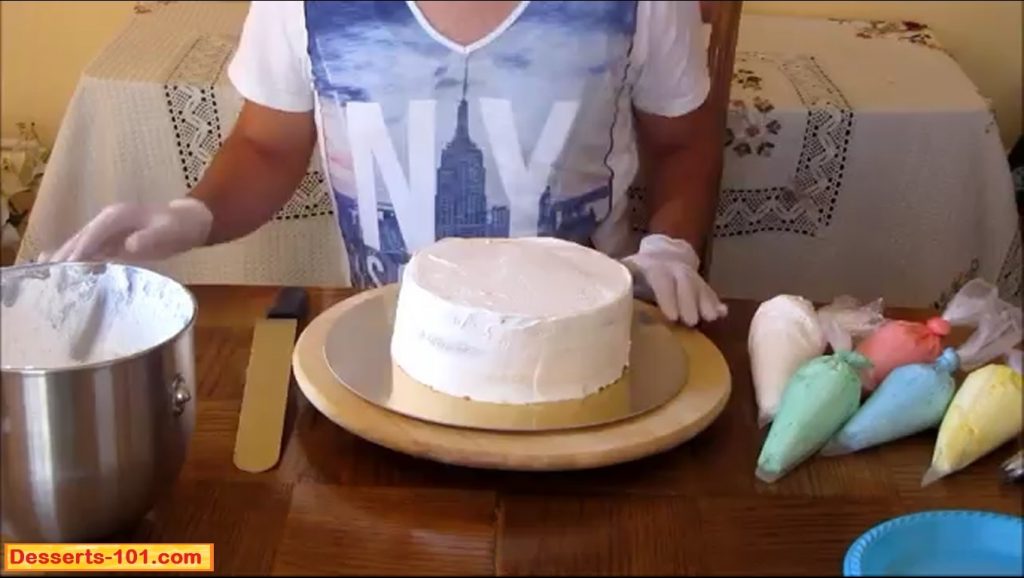
Ready to decorate the cake.
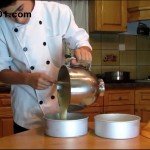
- A crumb iced cake on a serving board. For the cake I used my chocolate cake recipe and made4 layers and crumb iced it.
- Swiss Meringue Buttercream – I would make a double recipe and leave half white, and the the remaining icing into 4 bowls and color the my desired shades of yellow, blue, green and red. You will have plenty of icing left over for more projects.
- Food Coloring – I prefer a gel/paste coloring
- A decorating bag
- A large star tip fit the decorating bag
- Disposable decorating bags
- Icing Spatula or a Bench Scraper
- A cake decorators Turntable or Lazy Susan so aid in spinning the cake.
Water Color affect to the sides of the cake.
This impressive way to spread the icing will leave the wondering how did you do it! And it is quite simple. Start out by piping a line of icing around the sides.
-
- Ready to decorate the cake.
-
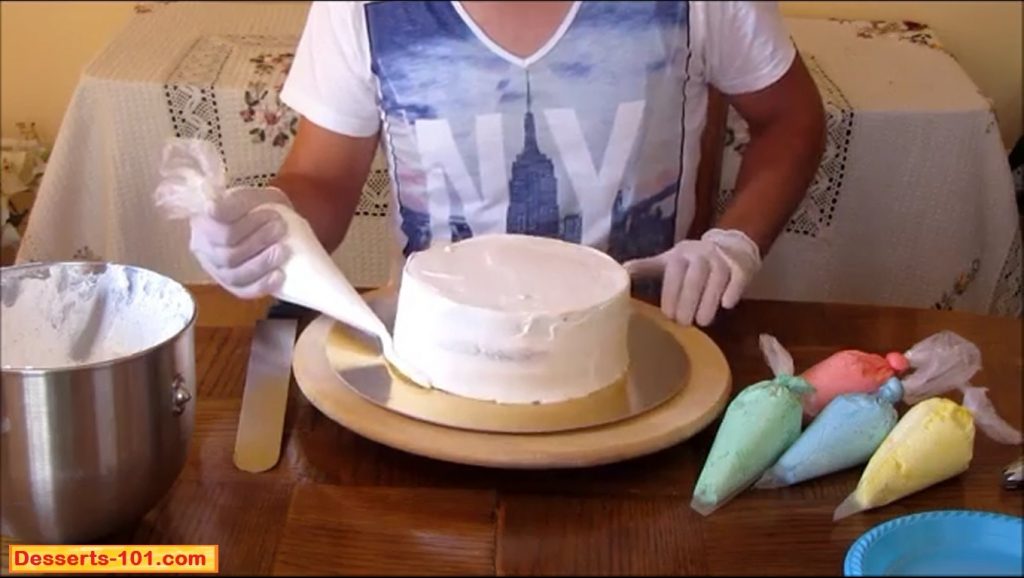
- Starting the water color technique sides. First thing to do is to put a link of white colored icing around the sides at the base.
-
- Above the white goes a line of blue colored icing.
-
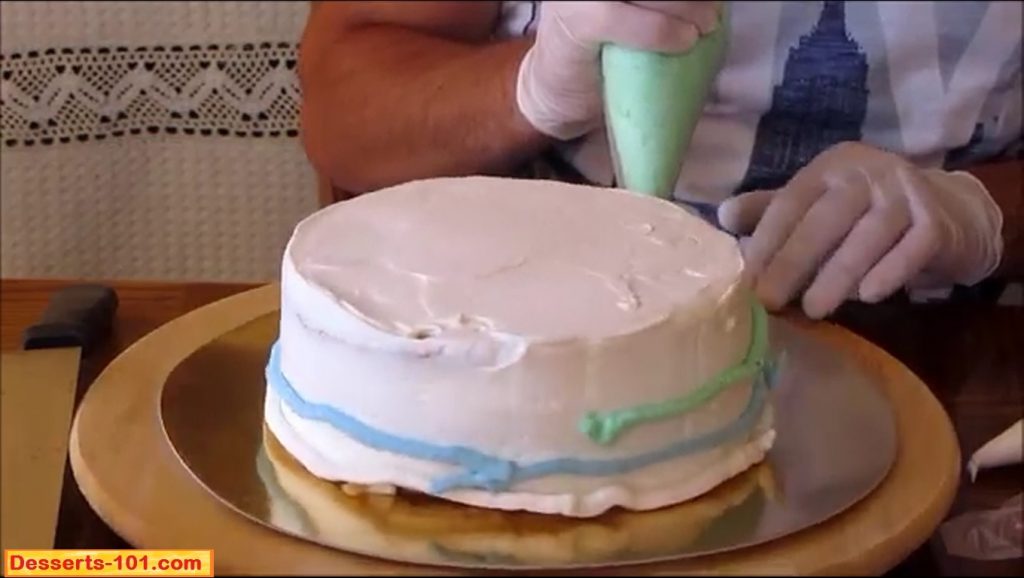
- Now a green colored icing row.
-
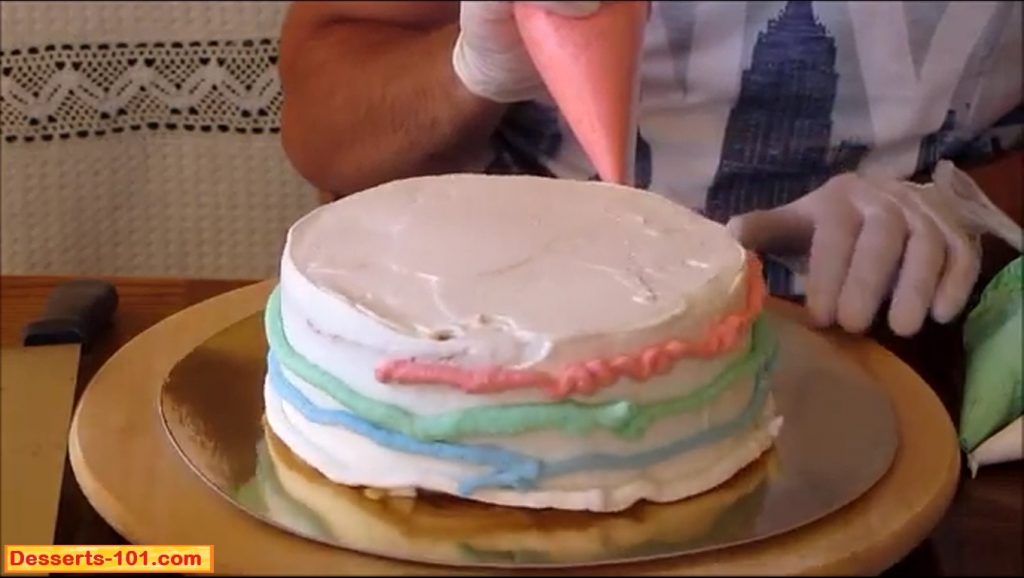
- Next is a red colored icing line.
-
- Lastly is a yellow colored line which should be just about a the top of the side.
Next you smooth the sides by holding a spatula or bench and spinning the cake to smooth everything flat. Once you have gone completely around you and make patches as needed.
-
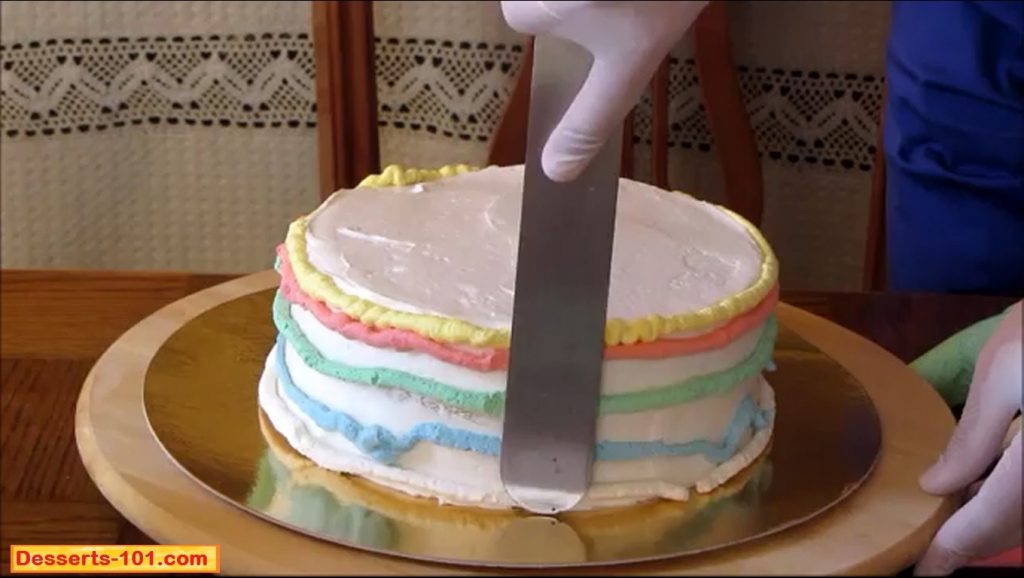
- Holding the cake spatula at a right angle to the side.
-
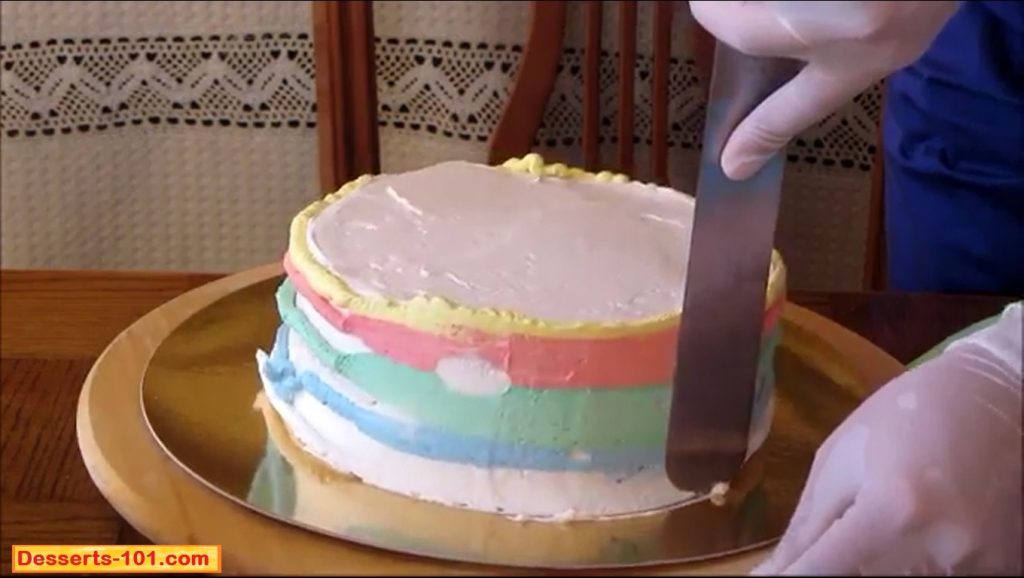
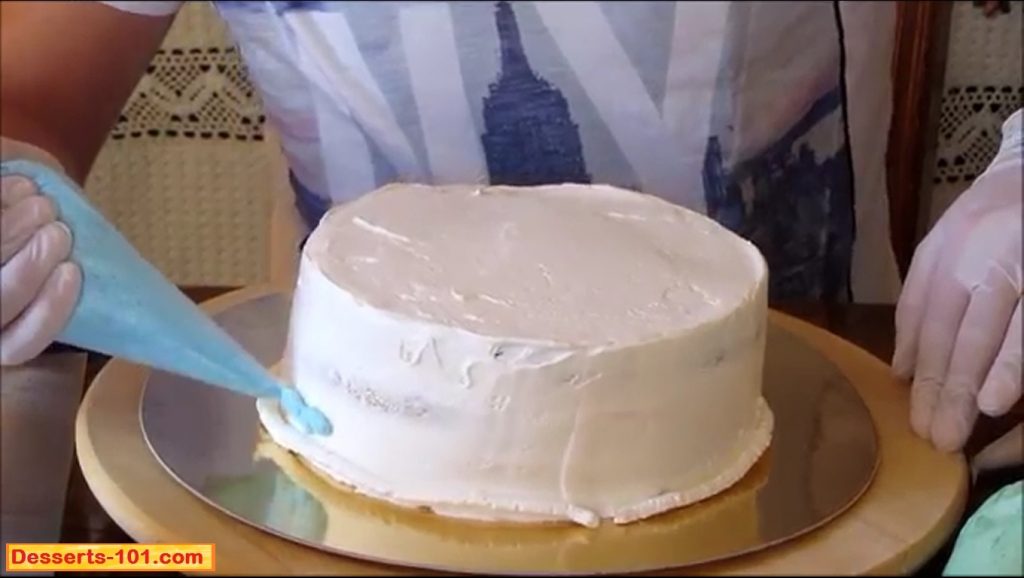
- Now you spin the turntable and flatten the icing out. Notice how it spreads and fills the space in between and the colors run together like you are painting.. If you have spots that need more icing, just add some more and smooth the side again.
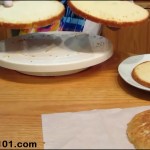
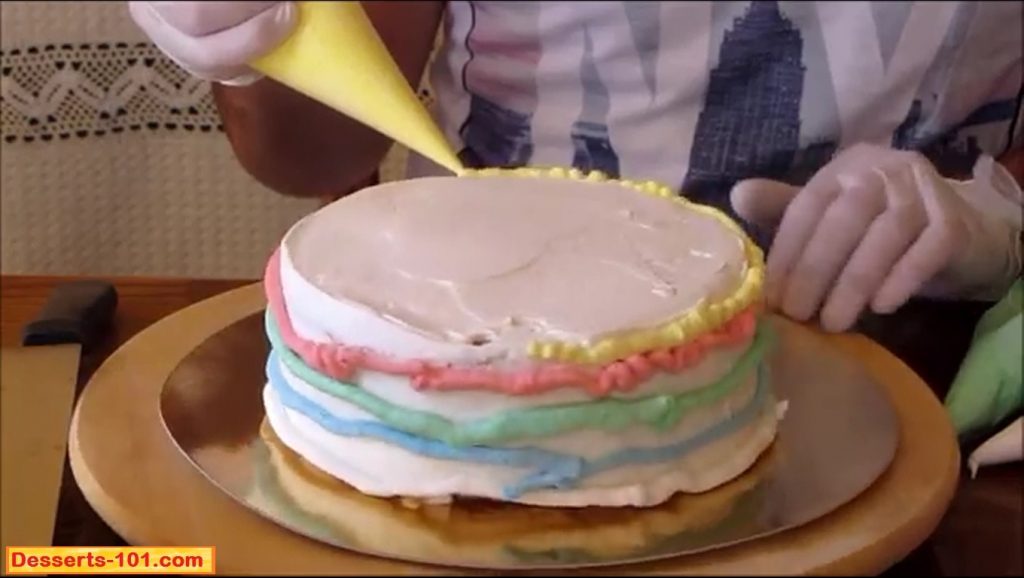
Onto removing any icing on the top of the cake. Since we will be covering the cake with stars, we only need to get the big pieces off and do not care if it spreads on the top.
-
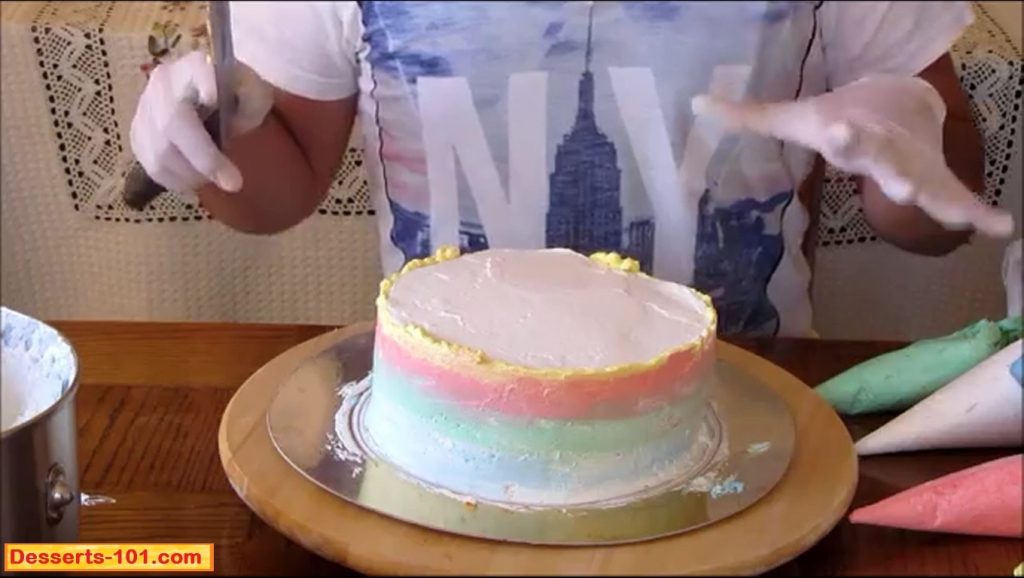
- Completed the sides. Now it is time to clean up the top.
-
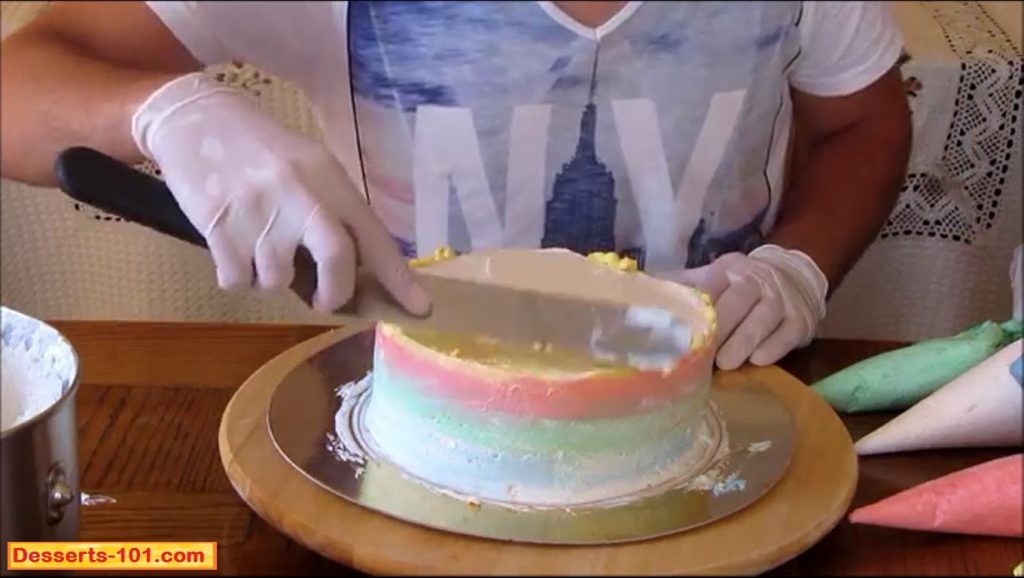
- Since the top of the cake will be covered with stars cleaning up the icing op the top is easy. just use a spatula and work from the outside to the center. Do not worry if you leave icing on the top, it will be covered over.
Moving on to the piping/decorating the cake.
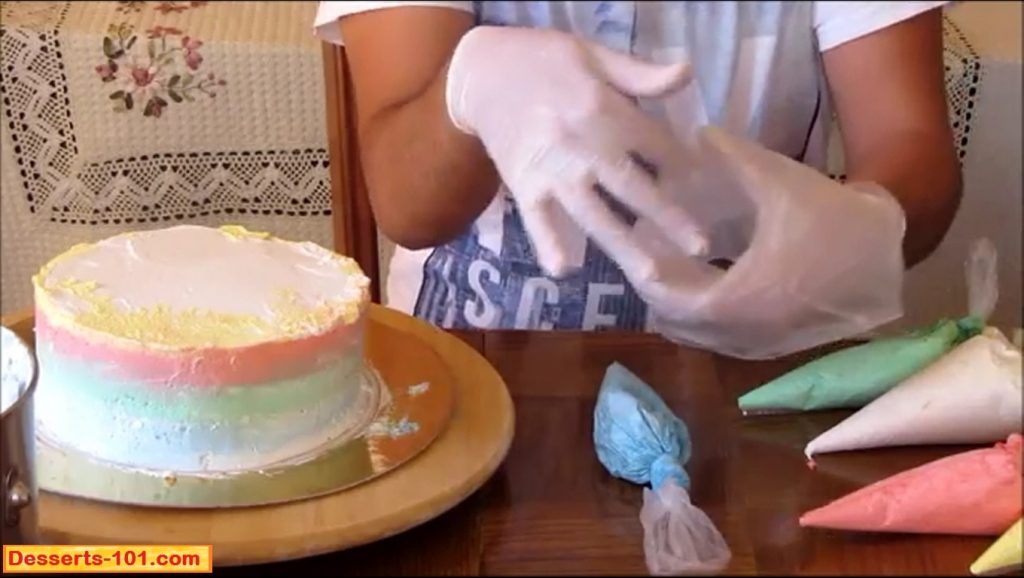
Prepare the multi colored filled piping bag.
We are going to fit a decorating bag with a large star top and then fill the bag with lines of colored icing.
-

- Fit a pastry bag with an Ateco 826 Large Star Tip.
-
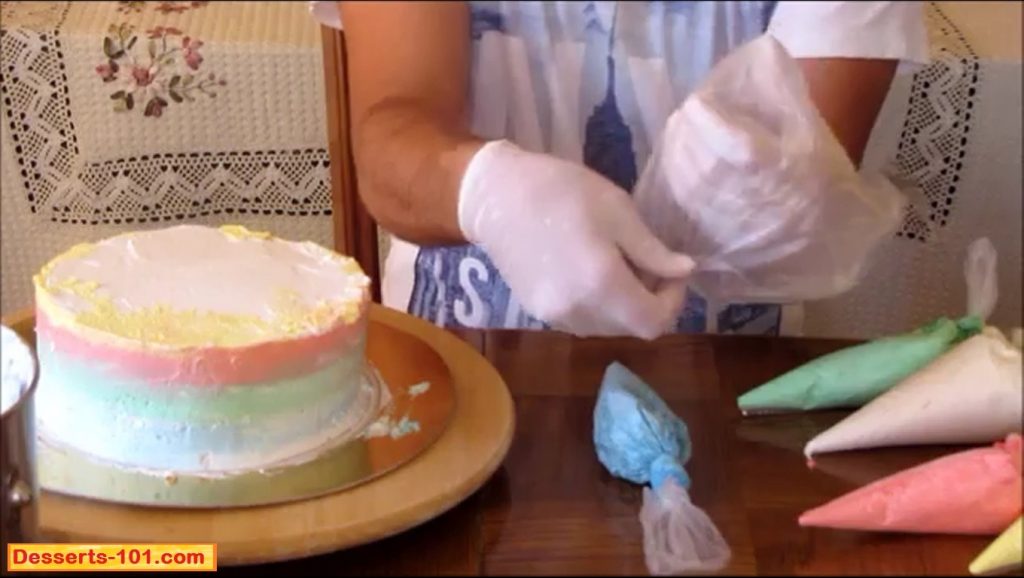
- Cup the pastry bag in your hand and fold down the bag half way to allow you to fill it.
-
- Next, spread the bag open wide to allow filling.
-
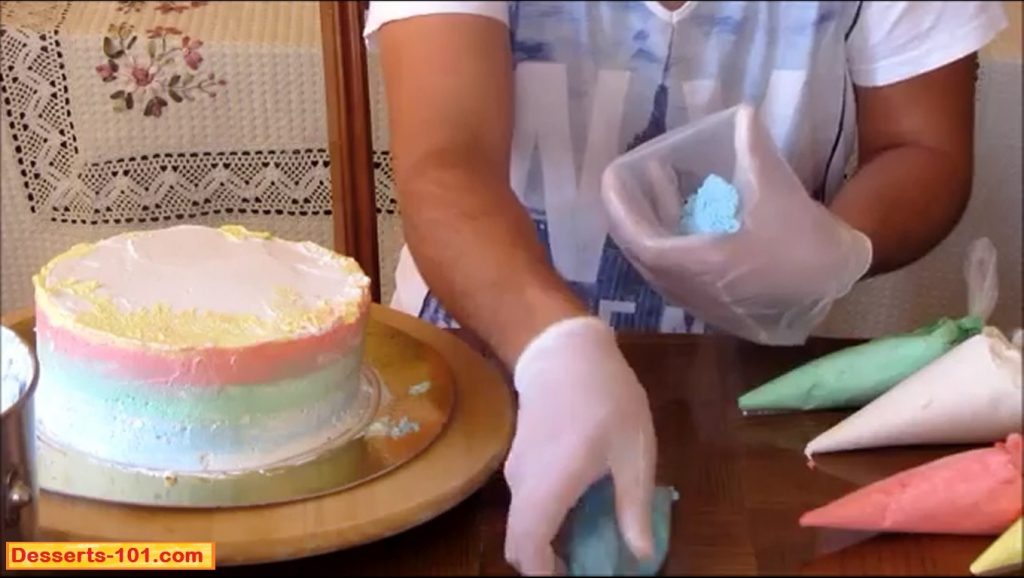
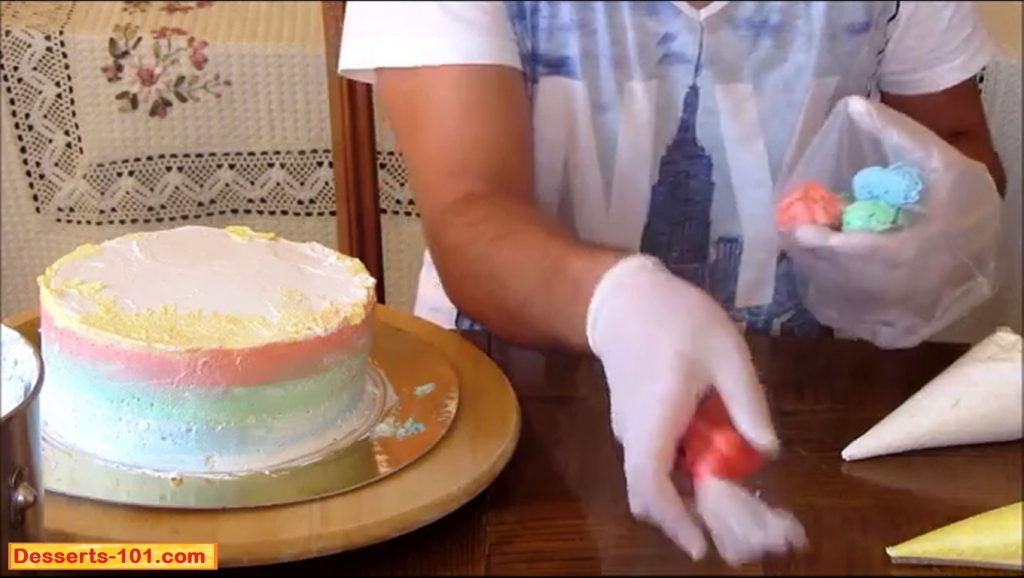
- Normally you use a spatula to fill the bag, but here use pastry bags since we are filling multiple colors. Start by making a line of blue icing.
-
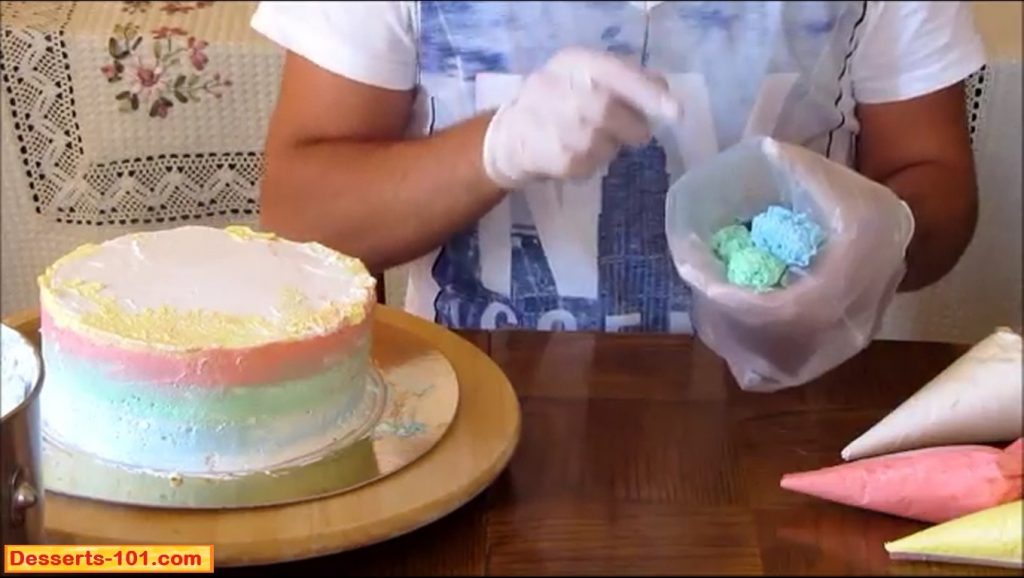
- Add a line of green icing aside of the blue.
-
- Add a line of red icing aside of the green.
-
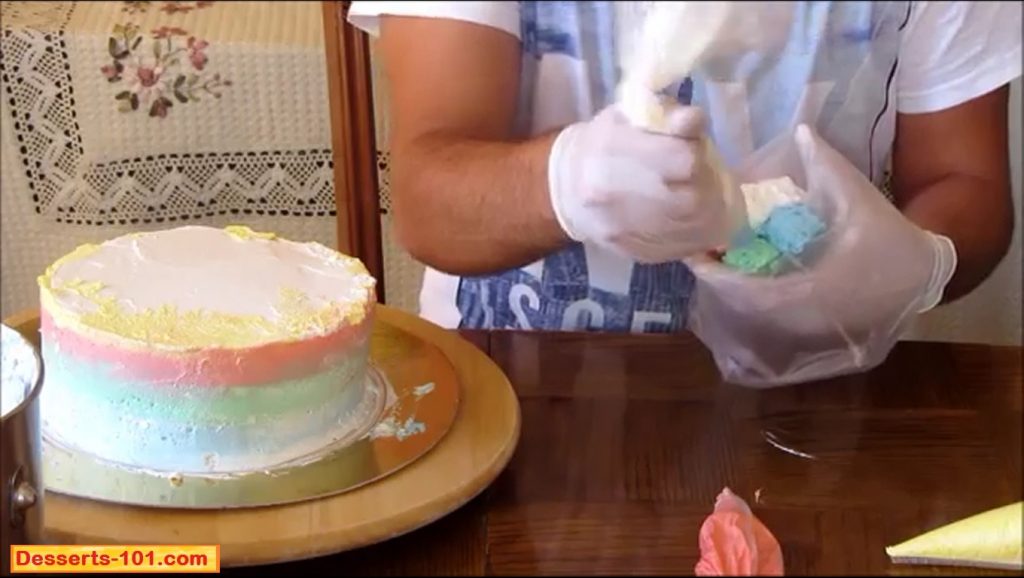
- Next is a line of white icing. By now you can see how the pastry bags make adding the icing much easier.
-
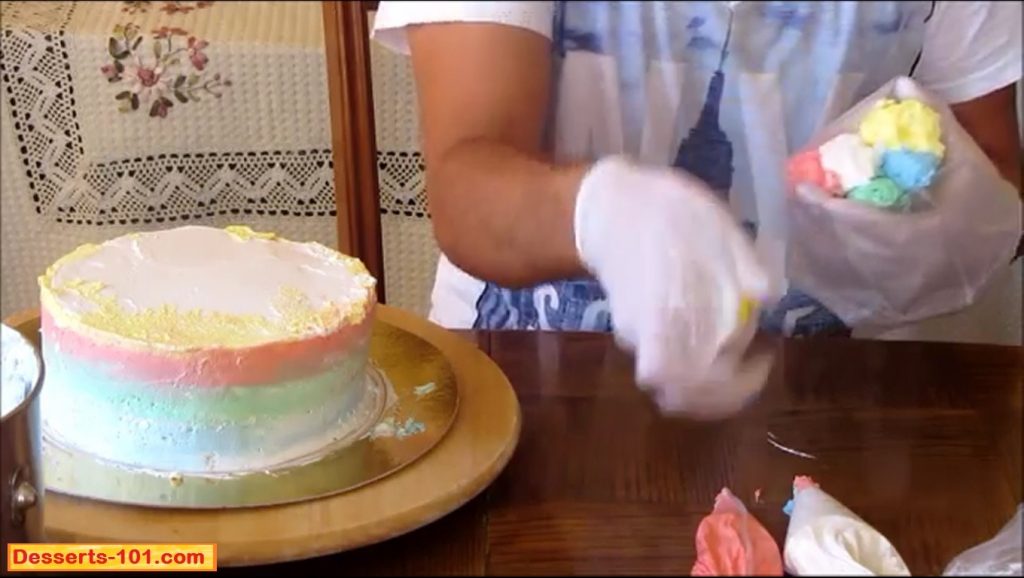
- Now finish off with a yellow strip of icing.
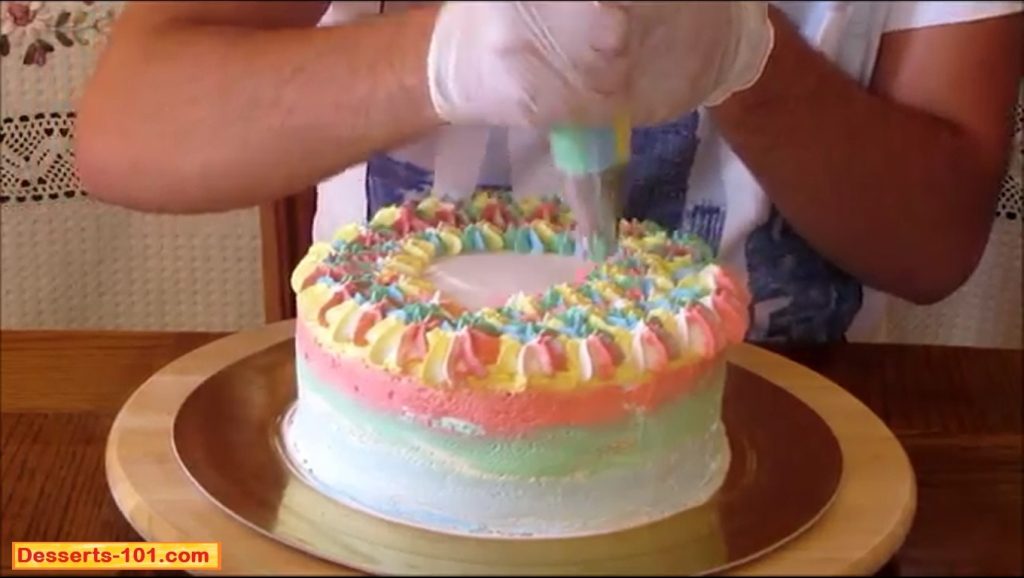
Piping the large star outer border.
First you need to pipe a single row of large stars while holding you decorating bag straight up an down. This will look very pretty if you can keep the decorating bag in the same direction (orientation) as you move around the cake showing off the different colors from different views.
-
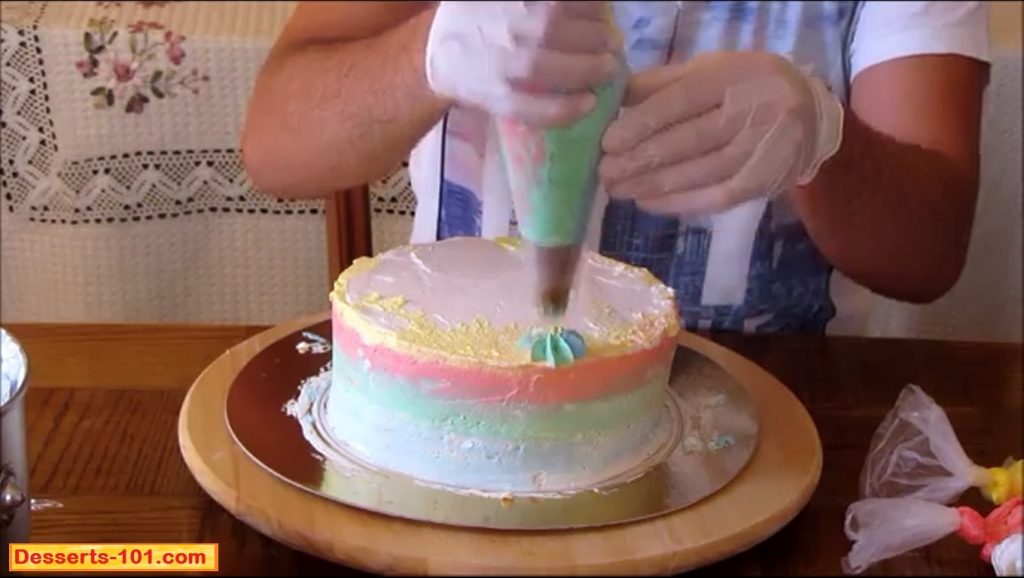
- After you rolled the bag up, and squeezed some test icing out until all the colors were coming through, pipe large stars around the outer edge of the cake. try to keep the bag pointed in the same direction as you go around the cake this way your stars with change colors on the outside.
-
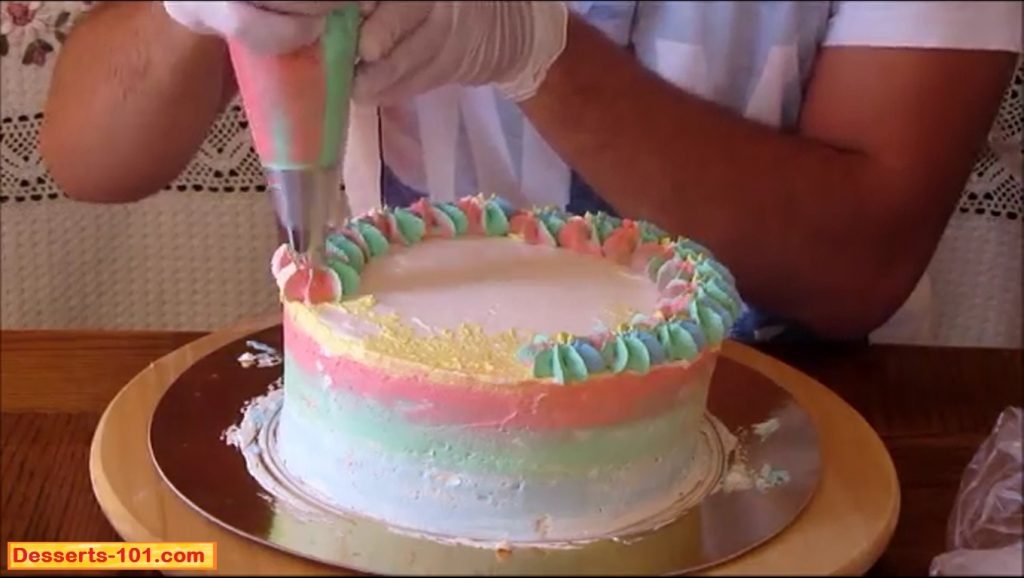
- Continue piping the large rainbow stars.
Fill in the remaining area on the top of the cake.
Fill in the area inside the border you just created. Make you stars smaller then the edge ones.
-
- Fill the inside in with a smaller rainbow star using the same tip.
-
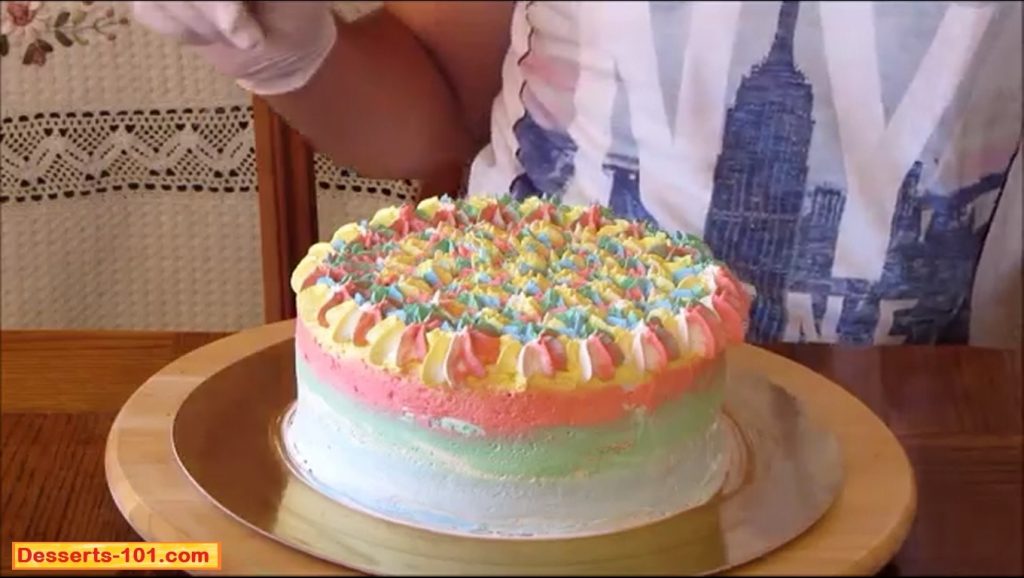
- So pretty one all the rainbow colored stars are finished.
Pipe White Bottom Shell Border
To a piping big fitted with an Ateco #866 French star tip filled with white icing, pipe shells around the base.
-
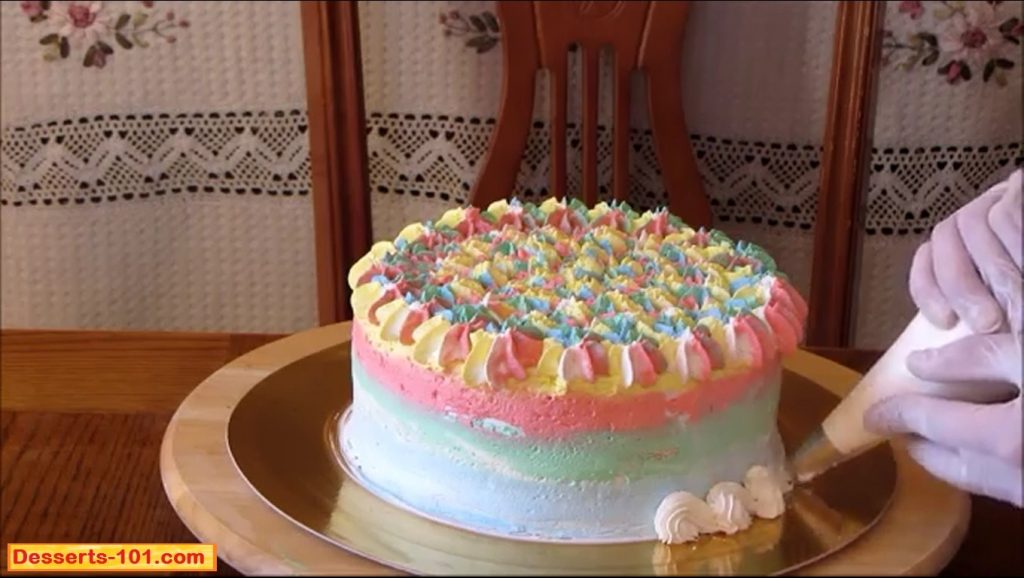
- Add a white shell border around the base.
-
- Everyone asks me how to decorate a beautiful cake for a beginner. Well, this cake is for you. It looks fancy and people will think you spent a lot of time decorating when, with just a few tricks, you easily did it in a flash. That’s right you can do it too. Follow along and I will show you how it is done.
Admire you finished cake. I told you it was easy and now you have done it!
Feel free to change out tips for different design and to use different colors of icing for your special occasion.
Watch how easy it is to decorate a cake using the Water Color Technique Sides and Multi-colored stars
- 1 crumb iced cake, your flavor(s)
- 2 recipes Swiss Meringue Buttercream
- Food coloring - I prefer gel or paste in Red, Yellow, Blue and Green
- Ateco #866 French Star Tip
- Ateco #826 Star Tip
- Piping bags
- Lazy Susan or cake stand
- Icing spatula or bench scraper
- Prepare you cake by baking and doing an initial crumb ice.
- Prepare you Swiss Meringue buttercream and divide and mix colors.
- Pipe rows of icing around the sides and smooth out to create the water color effect.
- Pipe the star border on the top edge and fill in with smaller stars.
- Pipe a shell border around the side base.